Hotpoint Oven Parts

Hotpoint Appliance Parts

Popular Hotpoint Oven Parts

Your Price
$45.72
   In Stock
Hotpoint Oven Bake Element - 240V
★★★★★
★★★★★
113 Reviews
PartSelect Number PS249424
Manufacturer Part Number WB44X200
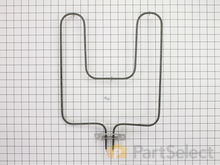
This is a 240 volt bake element for your oven or range. The kit comes with two installation screws and the element. The element functions by supplying heat from the bottom of the oven to bake or cook your food. You may need to replace the bake element if your oven is not heating properly. This is a black metal part (Width 13 inches, length 16.5 inches, depth 1-1/2 inches ) which can be installed onto your range with a screwdriver. Installation is rated as "medium" difficulty. This element is the part that heats to allow cooking, and if broken or missing you'll be unable to cook. This part attaches to the lower section of the range. Refer to your model number and user manual to ensure this part is right for you. Each screw gets screwed into each wire terminal with a Phillips screw driver. Hold the wires forward to make sure the wires do not fall back through the rear of the oven. Unplug your appliance or shut off your circuit breaker to the appliance before installing the new part.
Fixes these symptoms
  • Element will not heat
  • Little to no heat when baking
  • Little to no heat when broiling
  • See more...
Installation Instructions
Beth from Matthews, NC
Replacment of the bake unit
The hardest part was removing the old nuthead screws off the old bake burner. Once those were off installing the new bake element was simple. One screw in each wire terminal, two hex head screws to hold the unit in place. Works like a charm! Read more...
Your Price
$71.47
   In Stock
Hotpoint Oven Bake Element
★★★★★
★★★★★
36 Reviews
PartSelect Number PS249249
Manufacturer Part Number WB44K5013
This bake element is used in ranges and located at the bottom of the oven. The bake element supplies heat for baking. If your symptoms include: your oven is not heating evenly, not starting, or the heating is not consistent, then replacing the element can be the solution. Remove two retaining screws, make sure to disconnect the two connecters at each end of the element, and replace with the new one. Before starting this replacement, make sure the range is unplugged from the power source or shut off from the house circuit breaker. The tool needed is a Phillips screwdriver.
Fixes these symptoms
  • Element will not heat
  • Little to no heat when baking
  • Oven is too hot
  • See more...
Installation Instructions
Carl from Wynnewood, PA
bake element shorted out, sparking like a sparkler
first, made sure circuit breaker was off
second, used nut driver to remove 2 screws on old element, pulled it from the back of the oven
third, removed 2 wires from old element (spade connectors)
fourth, connected new element and pushed back into oven.
fifth, reinstalled 2 screws securing new element

this was all done by my 15 yr old son under my supervision.
Read more...
Your Price
$56.73
   In Stock
Hotpoint Oven Meat Probe Thermistor
★★★★★
★★★★★
4 Reviews
PartSelect Number PS1481046
Manufacturer Part Number WB20T10024
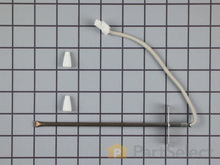
This probe is used to check the internal temperature of the meat to ensure proper temperature is reached. Also known as a Meat Probe.
Fixes these symptoms
Installation Instructions
Eric from SOUTHBURY, CT
Temp probe was defective
Threw the old one out - plugged the new one in. Steak came out just as ordered - medium rare. Read more...
Your Price
$81.33
   In Stock
Hotpoint Oven Broil Element - 240V
★★★★★
★★★★★
20 Reviews
PartSelect Number PS249244
Manufacturer Part Number WB44K5009
This OEM-sourced broil element with push-on terminals is located on the roof of your oven cavity, providing heat from above to cook and heat your food. It requires a 240-volt power supply to function properly. The element measures 13 1/4 inches in width and has a length of 15 7/8 inches from the mounting bracket to the back. If you are experiencing issues like uneven broiling or lack of heat, it is likely that the broil element is faulty and needs replacement. Before starting the replacement process, ensure that you turn off the oven at the breaker panel and let it cool down. To carry out the repair, you will need a flathead screwdriver, nut driver, and pliers. Begin by removing the oven door and racks. Then, unscrew the mounting screws that hold the old element in place and disconnect its wiring. Carefully pull out the old element from the appliance. When installing the new element, slide the wire contacts onto the terminals, insert it into the designated slot, and secure it with its fasteners. The top of the element is held in place by fork-like support clips, which are sold separately from the element itself.
Fixes these symptoms
  • Element will not heat
  • Little to no heat when baking
  • Little to no heat when broiling
  • See more...
Installation Instructions
Dianne from Rockville, MD
The broiler element caught fire and burned out while I was broiling a steak.
First I removed the two screws that hold the element in place. I then pulled the element out about 3 inches, but I had not turned off the power.
So, I shorted out one of the wires. Then I turned off the power but was afraid to go any farther.
An appliance repairman was at my house that day fixing my dryer seal. He was able to pull the wires through the insulation successfully and install the broiler element. He did not charge me any extra for this little extra job. But I learned my lesson. Cut the power before you begin! He told me that I could have wound up with a much bigger repair if the short had been in the wire that is connected to the control panel of the oven. I was very lucky!
Read more...
Your Price
$16.68
   In Stock
Hotpoint Oven Single Heating Element Support Clip
★★★★★
★★★★★
7 Reviews
PartSelect Number PS243701
Manufacturer Part Number WB2X9719
The metallic clip, or also known as a broil element support, is for a oven element on a range. This part holds the broil element in place on top of the oven. If your support clip is broken then this replacement should be the solution. The tools needed for this project are slip joint pliers. For safety precautions, make sure to unplug your range from the power source, or shut off the house circuit breaker before starting this project. Refer to the installation instructions for best results and accuracy.
Fixes these symptoms
Installation Instructions
Paul from Canton, NY
broiling element had burned through, req. its replacement
First I removed the two screws that hold the element in place. I also removed a screw that held one end of a support bracket. I then pulled the element out about 3 inches and disconnected the two wires. Reversing these steps, I finished the element's replacement.

I had noticed that the former element was sagging at the front end. I installed the additional clips (not original) on each forward end of the element for additional support.
Read more...
Your Price
$151.71
   In Stock
Hotpoint Oven Sensor
★★★★★
★★★★★
5 Reviews
PartSelect Number PS236043
Manufacturer Part Number WB21X5301
It is possible that your oven is cold because of a fault in the temperature sensor. The temperature sensor regulates oven temperature in modern ranges, like a thermostat. It is on the back wall near the broiler on the top wall. On a newer oven, there may be a fault code displayed. Faulty temperature sensors are often responsible for F3 and F4 error messages on an electric range. Check your manual or the manufacturer website to find out the proper resistance of the temperature sensor. To check your sensor, unplug the oven and use a multi-meter to see if your sensor is at the correct resistance.
Fixes these symptoms
  • Element will not heat
  • Little to no heat when baking
  • Oven is too hot
  • See more...
Installation Instructions
James from Austin, TX
Oven tempature was approximately 150 degrees to low
This repair is EASY if you know how to use an ohm meter. If not, seek help for this step.

SYMPTOM:
The oven (JKP27WOP3WG or JKP27WP3WG and many ovens like it ) was not getting hot enough. Verifying the cooking temperature with an typical oven thermometer, I was able to determine that the oven was cooking temperature was about 150 degrees to low.

FAILURE POINTS:
There are two logical failure points (1) The oven sensor ( WB21X5301 about $75), or the (2) the controller board (PS238233 about $252). In my case it was the controller board. When replaced the oven worked beautifully.

REPAIR:
As with any repair, you MUST DISCONNECT POWER TO THE UNIT BEFORE SERVICING!!!

Pull oven from the wall:
- Disconnect power by flipping the circuit breaker to the OFF position.
- Remove the top flange / cowling from the top of the oven (it just pulls off)
- Remove two screws under the top flange / cowling
- The whole unit easily slides out, but it is highly recommended that you use two people to place the oven on the floor.

As a diagnostic between these two parts, if the oven sensors measure approximately 1.1K ohms of resistance at room temperature, then it is probably not the sensor. The oven sensor wires are connected to two white wires that run up to the controller board. You need to disconnect the oven sensor to make the measurement. You may either completely remove the oven sensor by cutting the wire (be sure to allow yourself enough slack so that they may be safely reconnected) where it connects to the white wires, OR, (preferred method) if leaving the oven sensor partially installed,
- Remove the top sheet metal cover (10 screws)
- Remove the service connect cover (2 screws - this is where the main Power cord comes into the unit)
- Disconnect the white wires from the controller board (this connector which also includes other circuits is on the left side when looking at the controller board).
- Remove two screws from oven sensor but just let in dangle down so that you can put the sensor in the ice water / boiling water.

Measure the resistance under the following conditions. Your ohm meter should read APPROXIMATELY...
- 1.02K ohms in ice water
- 1.09K ohms at room temperature
- 1.36K ohms in boiling water.
If you get approximately these readings, then it is NOT the oven sensor. If that checks out then re-install the sensor AND the connector.

If it is NOT the sensor, replace the controller board.
- Take a moment to write down the color of the wire to the LETTERING (N, L, G, C / COM,,,) on the controller board. The connectors are in different locations on the new controller board so the wire color to the letter designation is significant.
- Carefully remove the wires one at a time
- VERY carefully remove the keypad ribbon cable from the right side of the controller board.
-- The ribbon cable will disconnect by releasing some little pressure clips on the side of the connector.
- Remove the controller board (4 screws)
- Install new controller board (4 screws)
- VERY carefully connect the keypad ribbon cable on the right side.
-- Make sure that the connector is in the OPEN position first, then,
-- Slide in the cable ensuring that all parts of the ribbon made it into the connector, then
-- Press down on the connector locking tabs.
- Reconnect each wire to the correctly lettering on the board.
-- Again, the connectors MAY BE in a different order on the replacement controller board. Match color to letter.
- Reconnect the (5 wire?) connector that includes the white oven sensor wires.
- Make sure everything looks normal, (i.e. no wires are pinched, remove tools from top of oven area, etc.)
- Re-install top cover.
- Re-install service connect cover.

You can test the unit while it is out of the cabinet,
- Make SURE that all sheet metal covers are in place.
- Flip power breaker to "On".
- Test that oven gets to the desired temp.
Read more...
Your Price
$36.50
   In Stock
Hotpoint Oven Rack
★★★★★
★★★★★
13 Reviews
PartSelect Number PS8755312
Manufacturer Part Number WB48T10094
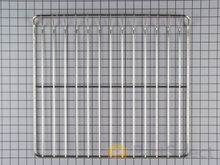
Sold individually.
Installation Instructions
Patricia from LIBERTY, TX
old oven racks
I just took the old oven racks out and put new oven racks in. Read more...
Your Price
$39.69
   In Stock
Hotpoint Oven Broil Element Kit
★★★★★
★★★★★
5 Reviews
PartSelect Number PS249386
Manufacturer Part Number WB44X134
This element has screw on terminals.
Fixes these symptoms
  • Element will not heat
  • Little to no heat when broiling
  • See more...
Installation Instructions
Brian from WATAUGA, TX
Both heating elements not working
Removed racks from oven. Each element had two screws, used socket wrench for all, gently pulled out element to exposé wiring removed wires with same socket. Once element out of oven, reattached wires to new element, reset element to back of oven and with the two screws attached back. Did the same process for top element only exception was a bracket holding top element from leaning down. It had two screws all the same size as element screws. Once all back in place turned on breaker to check each element. Read more...
Your Price
$79.45
   In Stock
Hotpoint Oven Rack
★★★★★
★★★★★
5 Reviews
PartSelect Number PS6447645
Manufacturer Part Number WB48T10093
Sold individually.
Your Price
$30.07
   In Stock
Hotpoint Oven Broiler Pan - Large
★★★★★
★★★★★
10 Reviews
PartSelect Number PS1517612
Manufacturer Part Number WB48X10056
This large broiler pan is found in the bottom of your oven and is used to catch drippings from broiling foods. This part includes the grate and bottom pan and is made of porcelain. The grate measures 15-1/2 inches wide by 13 inches deep and the pan is about 17 inches wide by 13 inches deep. No tools are required to replace this item, simply pull out the lower drawer of your range, pull down the front of the drawer, slide the pan out and slide the new one into place. This is a genuine part sourced right from the manufacturer.
Installation Instructions
kevin from miami, FL
missing trim and trim bracket
Attatched trim bracket to cabniet with screws that by the way were not supplied then attached plastic trim to bracket Read more...

Hotpoint Oven Appliance Types

Popular Hotpoint Oven Models

Below are the most popular Hotpoint Oven models we have. Enter your model number in the search box to find your model.