Whirlpool Microwave Oven Combo Parts

Whirlpool Appliance Parts

Popular Whirlpool Microwave Oven Combo Parts

Your Price
$8.87
   In Stock
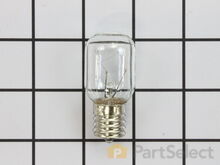
Whirlpool Microwave Oven Combo Light Bulb - 40W
★★★★★
★★★★★
157 Reviews
PartSelect Number PS2376034
Manufacturer Part Number 8206232A
This 40w light bulb is a replacement bulb constructed of glass and metal. It is an easy-to-install electrical part which produces 40w of light. If the bulb won't light up then it may be broken and should be replaced. The bulb attaches directly to an appropriate light socket and has a small screw-in base. To access the exterior light bulb, you will need to remove the panel on the bottom of the microwave using a Phillips screwdriver. If your exterior light bulb has not been changed before, it is probably held in place with some silicone. You will need to cut away this silicone to remove the old bulb. If you cannot access the silicone with a utility knife, it can be removed using dental floss. Once the silicone is removed, simply unscrew the old bulb, and replace it with the new one. Be sure to disconnect the power to the microwave before you begin this repair. This light bulb measures about 1 1/8 inches. We do not recommend using a higher-wattage bulb for this appliance, and can only recommend this specific bulb. If fixing the bulb does not solve your microwave light issue, it's possibly a problem with the socket, which means the socket and/or board will need to be replaced. This can be a more dangerous repair, so consult your user manual or a technician before attempting.
Installation Instructions
Chris from Cedar Hill, TX
Burned out light under microwave and Filters needed changing
I just removed the multiple screws which held the hood cover on. I then attempted to remove the light bulbs from the socket. This proved impossible because the bulbs were so fragile from the heat and grease build up. To make this task much easier and probably safer, just replace the bulb housing and light bulb. The bulb housing unplugs very easily. Just replace it then screw your new bulb in. P.S. Be sure to unplug appliance before you start.

The filters are very easy to replace. No tools needed.

Hope this helps.
Read more...
Your Price
$72.96
   In Stock
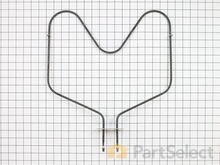
Whirlpool Microwave Oven Combo Bake Element - 2600W 240V
★★★★★
★★★★★
87 Reviews
PartSelect Number PS11740695
Manufacturer Part Number WP308180
The bake element in your oven is the part that provides heat when cooking. If your oven is too hot, or not hot enough, or does not heat evenly, you may need to replace the bake element. This part is 2600 Watts and 240 Volts. It is a closed hinged style bake element which is 15-3/4 inches long and 16-5/8 inches wide. The terminal depth is three inches and they are 1-3/4 inches apart. This part is made of metal and is black in color. Be sure to disconnect power to the oven before completing this repair.
Fixes these symptoms
  • Element will not heat
  • Little to no heat when baking
  • Oven is too hot
  • See more...
Installation Instructions
Joe from Greeley, CO
oven wouldn't heat
First I removed the two screws that hold the element in place. I then pulled the element out about 3 inches and disconnected the two wires, then removed element and replaced with new
.
Read more...
Your Price
$70.38
   In Stock
Whirlpool Microwave Oven Combo Bake Element
★★★★★
★★★★★
52 Reviews
PartSelect Number PS11750369
Manufacturer Part Number WPW10207397
The bake element is located at the bottom of the oven and gives off heat in order to bake evenly. If you notice that the element is not heating up or is not cooking evenly, it could be because it is broken or burnt out. All you need for this simple repair is a small screwdriver. To complete this repair, you will need to first turn the oven off (or shut off the house circuit breaker), remove the two screws that are holding the old element in place, remove the two wires from the old part, and then connect them to the new part and screw back into place.
Fixes these symptoms
  • Element will not heat
  • Little to no heat when baking
  • Oven not heating evenly
  • See more...
Installation Instructions
Daniel from Cheraw, SC
I broke the Bake Element while cleaning the oven.
I removed the two screws that held the bake element in place. Next I removed the Bake Element. I had to unscrew the oven to go behind it because when one piece off of the element broke, it slide back behind the oven. I pushed the wire back thru the piece holes, connected the Element, and pushed the element with the wires back through the holes. I rescrewed the element in place and the oven. PartSelect helped me to save this year's Christmas. Read more...
Your Price
$21.56
   In Stock
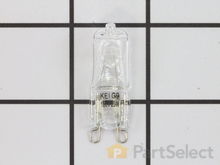
Whirlpool Microwave Oven Combo Microwave Surface Light Bulb
★★★★★
★★★★★
20 Reviews
PartSelect Number PS11722423
Manufacturer Part Number W10709921
This microwave surface light bulb (120v 25w) is an OEM replacement part used in microwaves and microwave/hood combos. It is one of the two halogen lightbulbs that are positioned on either end of the base of the appliance to illuminate the cooking surface. The light allows you to easily monitor the cooking/heating process. Over time the light bulb may burn out or break resulting in difficulty viewing the cooking surface, and increased chances of injury while cooking. To replace the bulb, unplug the appliance and remove the light cover/lens, to access the bulb housing. Carefully unscrew the old bulb from its socket to avoid breaking it and damaging the assembly. Inspect the socket to check that it is in good working condition. If both of your light bulbs fail at the same time, the socket may be experiencing an electrical fault and will need to be replaced. Install the new bulb by screwing it into the socket. Reattach the light cover and plug in the appliance to check that the light bulb is functional. Each light bulb is sold individually.
Installation Instructions
Terry from LINDSTROM, MN
Light burned out
One Phillip's screw to remove glass on bottom of unit. Pull old bulb out & insert new bulb. Replace glass & screw. Read more...
Your Price
$57.88
   In Stock
Whirlpool Microwave Oven Combo Microwave Turntable Tray
★★★★★
★★★★★
65 Reviews
PartSelect Number PS12728515
Manufacturer Part Number W11373838
This genuine OEM microwave turntable tray is a circular plate made of glass and has a diameter of approximately 16 inches. It rotates food in your microwave oven, so that your food cooks evenly. It is found in the center of your microwave and can be removed from it for cleaning. If your turntable tray is broken, you will notice that it wobbles as it rotates, or it may not rotate at all. With a damaged turntable tray, your food will not cook evenly or thoroughly. The other components in your microwave may also wear out more quickly. To remove your current turntable tray, simply lift it off the spindle in the center of your microwave. This part is sold individually.
Fixes these symptoms
Installation Instructions
Liza from Monterey, CA
Microwave glass turntable when pop
After popping the last few kernals of popcorn, we hear a different kind of pop sound come from our microwave oven. When we looking inside, we found that the glass turntable had broken unevenly in half. Although we didn't understand why it had happned, we did know we'd be without the use of the microwave without a new one. After less than 10 minutes surfing online, I had found the correct part on PartSelect.com and had arranged to have it shipped to me by speedy delivery. Once it arrived, I just popped the new turntable into the microwave and used the box to dispose of the broken one. It could not have been easier and it saved me the cost of a service call and likely further delay. Read more...
Your Price
$112.25
   In Stock
Whirlpool Microwave Oven Combo Inner Door Glass
★★★★★
★★★★★
81 Reviews
PartSelect Number PS11742543
Manufacturer Part Number WP4449259
This inner door glass is a heat resistant part that fits into a stove, oven, wall oven, cooktop, or range as the inner glass panel of the appliance door. The glass panel allows you to see the items being cooked or heated in the appliance. Handle with caution and be sure to use gloves, as the door is heavy and the glass is breakable. Do not replace the glass until the appliance is cool to the touch. This genuine manufacturer part is approximately 20 inches by 10 inches. The inner glass door is sold individually and contains the glass panel only.
Installation Instructions
Robert from Wildwood, MO
Broke the glass panel inside the oven door -- dropped a baking dish on the glass!
Easily removed the door from the oven by releasing clips attached to the door hinge -- very nicely engineered. Removed about 6 philips head screws to allow the door assembly to be taken apart for access to the glass. Lifted out the broken glass, cleaned the inside of the door, installed the new glass, reassembled the door (a two minute project), and reattached the door to the oven. Cleaning the inside of the door took longer than the actual repair! Read more...
Your Price
$44.73
   In Stock
Whirlpool Microwave Oven Combo Microwave Glass Turntable Tray
★★★★★
★★★★★
23 Reviews
PartSelect Number PS12745298
Manufacturer Part Number W11402532
The turntable tray rotates in the centre of the microwave to help ensure the food cooks evenly.
Fixes these symptoms
Installation Instructions
Eric from MYRTLE BEACH, SC
Broken glass tray-cook
Put New tray in convection microwave,closed door and it was done. Read more...
Your Price
$13.66
   In Stock
Whirlpool Microwave Oven Combo Drip Bowl - Chrome - 8 Inch
★★★★★
★★★★★
26 Reviews
PartSelect Number PS2079053
Manufacturer Part Number 715878
This is a drip bowl, and it is used in conjunction with your range. The function of this part is to sit underneath your stove top burner element. This will allow the bowl to catch any spills that fall through the burner while cooking. This model is chrome has a chrome color trim, it measures 8 inches in diameter, and is sold individually. Before installing this part, you must wait until the surface of your range is cool to the touch. Replacing the drip bowl will require you to touch the burner on your stove top.
Fixes these symptoms
Installation Instructions
Nicholas from OWENS X RDS, AL
Over heating oven and uneven baking. Oven thought it was in self cleaning mode.
Sensor replacement was removing 2 screws and gently pulling on old sensor until the clip comes out. Secured the other end of the wires so that it did not fall back inside. Then connected the new sensor clip to the oven wire, then gently returning wire into oven, and then screwing the sensor into place.
The baking element was easier than the sensor. Removed the 2 screws holding the element into the back bottom of the oven, and pulled the element forward to disconnect from clamps. Inserted new element into clamps and screwed it in. ***NOTE that there will be a smell from the new element. This smell is normal. If the smell continues after a couple minutes stop the oven and wait an hour before reattempting.
Read more...
Your Price
$89.97
   In Stock
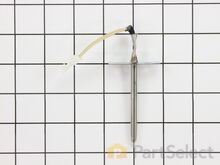
Whirlpool Microwave Oven Combo Temperature Sensor
★★★★★
★★★★★
7 Reviews
PartSelect Number PS11748765
Manufacturer Part Number WPW10131825
The temperature sensor measures the temperature inside the oven. If your oven is too hot, not heating evenly, is not heating enough when baking, or simply will not start, you could have a faulty temperature sensor. A faulty temperature sensor can be a fire risk. If your sensor is not working properly, you should look to replace it straight away. A failed oven sensor is most often responsible for F3 or F4 error messages on electronically-controlled ovens. Make sure you disconnect the power to your range before you start your repair.
Fixes these symptoms
  • Element will not heat
  • Little to no heat when baking
  • Oven is too hot
  • See more...
Installation Instructions
george from burke, AL
Wanted to update surface parts to a very old (27 yrs?) Jenn-air range on an island
The first task was to find the rings, drip bowls and elements on the "PartSelect" webpage. It was surprising easy, especially since I have no experience whatsoever in replacing range parts. The ordering was straight-forward, and most of the parts arrived within a week, a couple were back-ordered, but arrived a week later. Instillation was easy - just unplug elements, lift parts out, and insert new parts. I made a mistake in ordering - for the left side of the range, no adaptor rings are needed. I returned these excess parts to PartSelect, and within a week, they refunded the costs of these parts. Overall, I'm very please with the parts and service. Read more...
Your Price
$29.08
   On Order
Whirlpool Microwave Oven Combo Element Support and Clip
★★★★★
★★★★★
21 Reviews
PartSelect Number PS11766760
Manufacturer Part Number W10909479
NOTE: The manufacturer has modified the original design of this part to increase durability. As a result this part may take additional effort to install. The design includes a metal clip, which helps hold the top of the ceramic bracket in place. To install this part you will need to remove the microwave from the unit. Then open the cabinet to access the area above the supports location to insert the clip.
Installation Instructions
Peet from LAKE OSWEGO, OR
The ceramic bracket holding the conventional heating element at the top of the microwave oven broke for the second time
Part No. PS11766760
Ignore the other repair comments on this page!!! The new replacement part can no longer be put into place as simply as the original bracket. This is a r3eplacement part with a modified design. Significant parts of the microwave (MW) must be dismantled in order to provide access for insertion of the new part. This is confirmed by notes at other web sites which provide this part. My approach also required cutting/drilling holes into sheet metal panels.

Kitchenaid/Whirlpool must have realized that the original part is inherently weak at the point at which it is supported at the ceiling of the MW. The replacement part is a good option from a strength standpoint, but a horrible one for ease of insertion. The original is a single ceramic piece. The replacement part includes a metal clip which holds the top stem of the ceramic bracket from the top ("roof") side of the MW. Getting at the top of the MW cavity is the difficult part. One needs to pull the entire built in oven from its location and remove at least the control panel from the front of the unit.

It took me 3-4 hours one day to see how to install the replacement part. I failed since I unexpectedly found that there are two sheet metal panels above the MW cavity which need to be removed in order to access the slot through which the bracket stem must be inserted. Maybe somebody else can think of a way to remove the metal panels, but I could not do it so I put the MW back together again.

After this failure I considered trying to repair the original part again (this was the second time it had broken). The first repair broke when the conventional heating element was used in the MW. This option might again be an interim solution so I went back to trying to install the new replacement part.

This time it took over 3 hours to remove the control panel, several wiring units, a transformer, and several side and top sheet metal panels. Each removal step was preceded with a photograph of the item to be removed so that everything could be put back as they were originally located. After all of this work it was determined that the MW would have to virtually be totally dismantled in order to access the bracket slot at the top of the MW cavity. There were simply too many items on top of the sheet metal panels to allow for bending the panels up to access the necessary slot in the oven ceiling.

Fortunately, my wife asked why I didn't consider drilling through the existing sheet metal panels at the top of the MW. Had she suggested that earlier in the dismantling, it would have saved hours of work.

After reassembling the side panels I drilled access holes through the two sheet metal panels over the top of the MW oven. Certainly one needs to be careful in measuring the location for such holes. The holes were to be rectangular, developed by drilling multiple holes around the perimeters of the final "holes." The two sheet metal panels are about 3/4" apart and the lower panel is about 3/4" above the MW oven cavity. After drilling out the holes (about 1/2" x 1") I successfully found the desired slot in the oven ceiling. Then the drill cuttings needed to be cleaned out with a vacuum cleaner - including inside the MW oven.

Inserting the replacement part was not trivial. One needs to hold the ceramic part in the oven, with the heating element in its proper place on the bracket, and then simultaneously place the metal clip onto the stem which has been inserted through the slot at the top of the MW oven. Long tweezers are handy for putting the clip into place. Then the fun begins. Somehow the metal clip must be pushed down onto the ceramic stem. This is a trial and error task with various long blunt tools used to try and push the clip down while not pushing it off to the side. Somehow I got the clip onto the stem and the part was finally in place.

Another hour (+) to re-assemble the MW and push the oven back into the cabinet and the job was finally done.

btw, the only reason it was relatively easy to pull the oven out of the cabinet (and push it back in) was that we have two office chairs at home (without arms) which come up to about the right height for having the oven sit on the chairs. Adding some 2x4's on the seats of the chairs brought it to exactly the right height. The wheels on the chairs also helped. Given the weight of the oven, removing and replacing the oven unit is not a trivial task and one needs to be careful at all times.

There were several observations I made about the new replacement part which also "froze me in my tracks" early in this project. That is why I kept thinking of ways in which to repair the original part more effectively than I had done previously. The problem is that the ceramic section of the replacement part is not the same size as the original. It holds the heating element higher against the ceiling of the microwave and the horizontal section which holds the heating element is shor
Read more...

Whirlpool Microwave Oven Combo Appliance Types

Related Whirlpool Microwave Oven Combo Parts

Popular Whirlpool Microwave Oven Combo Models

Below are the most popular Whirlpool Microwave Oven Combo models we have. Enter your model number in the search box to find your model.